

Date: 24.04.2015
Webshop How-To Guide
It is very important for your online sales that your website can convert visitors into customers – and this requires a well-organized shop. By having a webshop your local business becomes global. This opens up for a broad range of marketing opportunities. It also gives new opportunities to increase your sales as a webshop allows you to expand your business and customer base to a larger and broader audience.
In this blog post we will give you a how-to guide to get you started with your webshop. You will learn how to structure and layout your shop, create products, set up payment gateways, receive and process orders and much more!
Your webshop can be integrated across your entire website and you decide how to create category and product pages. This means a product page is built using a page template and modules, just like the rest of your website. The only difference is that the E-commerce modules show products from your product database. In other words, it is just as easy and simple to build and design your webshop as it is with the rest of your website.
Product database
You create your products and product variations in the website tool under the tab ‘SHOP’. Simply click ‘Create new product’ and start to upload product images, product name, description, price, stock status, delivery time etc.
Variants
You can create product variations for your products. This is a great advantage if you sell different variations of the same product e.g. size, color etc.
If you for instance wish to sell shoes in different sizes you can create ‘Shoe’ as a product. Afterwards you then click ‘Create variant’ at the right site of the product in the product database. You can then create a variant for each shoe size you're selling. When you then insert the product ‘Shoe’ on your website, your customers will be able to choose the size (the product variation) they want in a drop down menu.
SETTINGS FOR PRODUCT VARIATIONS
Sometimes your product variations will need different settings than the main product. For example, your inventory could be different for one size shoe versus the other. At the main product level you can determine which settings can be customized at the variation level. In ‘Settings for product variations’ you can choose to differentiate stock settings, product images, product descriptions, shipping data, SKU codes, prices or tags.
You do this by clicking at the product in the product database and then clicking at the tab ‘Settings for product variations’. Then you mark the areas that you wish to differentiate at your variations. Once you activate the settings in the main product, the settings can then be changed at the separate variations. You do this by opening the settings for each variation and then creating the tags, prices etc. that you want.
Exmaple on product & variants
Jo & Jö is an example of how variations are created as sub products under the main product through the product database. As illustrated below you can see that the variations are shown under the main product. The main product is the shirt 'MANO. 1 BLUE'. The shirt (the main product) comes in different sizes thus each size is created as a variant, e.g. XSMALL, SMALL MEDIUM, LARGE, X-LARGE etc. In this way a variation for each size is created. When a customer clicks the shirt on the website a drop-down menu will show available sizes (variants).
Product database:

Variant preferences under main product settings:

Product variation settings:

Generally speaking, it is very important that you make it as easy as possible for you customers to find what they are looking for when visiting your website. If potential customers visit your webshop and find it confusing to navigate, it is very likely that they will leave your webshop instead of completing a purchase.
The structure and layout of your shop is therefore one of the most important prerequisites for a good customer experience!
Design & Layout
You can customize your shop in endless ways depending on the purpose of your webshop as you can integrate the E-commerce modules anywhere across your website.
Before you start building your webshop it is therefore a good idea to consider the purpose of your website. Should your website work as an integrated webshop where users can make purchases across the entire site or should the webshop be crated as it's own dedicated area of the site?
If you want a separate area of your website to be dedicated to the webshop using a shop 'homepage' with subpages you can get inspiration by visiting Pernille Bülow Jewellery and Milibe Copenhagen.
If you on the other hand wish to have several shop pages in the menu and want your website to be a completely integrated webshop, feel free to find inspiration at StickerDesign.dk and Bows by Hand.
You set up the shop pages the same way you set up regular content pages at your website.
As an example you can choose to create a page called ‘Shop’, as a regular page in the main menu. Then you can structure your shop by creating subpages with different categories e.g. Kids, Men, Women or perhaps Shoes, Shirts, Dresses etc.
TIP! – Create clickable graphic-categories instead of menu points:
On the website stickerdesign.dk the different product categories are visualized as clickable graphics. The clickable graphics then leads to the different subpages in the shop. This is a creative alternative to the ordinary bottoms and the navigation menu – and it will still guide your visitors around at your site.
In the example from StickerDesign illustrated below a ‘Three columns image’ module is used as a clickable category where each image is a clickable link to subpages for specific product categories. Example! Click one of the images below and you will automatically be sent to the subpages for each category.


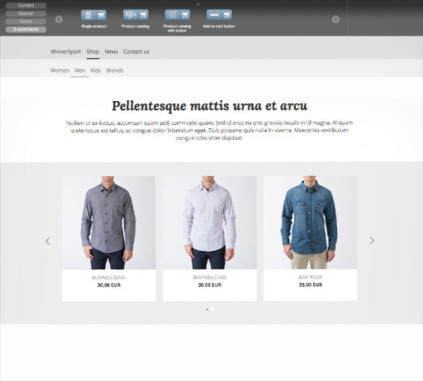
You will find the six different E-commerce modules in the tool by clicking ‘Modules’ > E-commerce. The modules include a ‘Single product’ module, a ‘Product catalog’, ‘Add-to-cart button’ and full-width product modules.

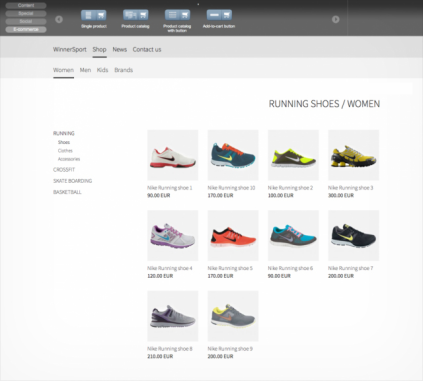
As the name implies, the module “Single product” is used to point out a single product whereas the “Product catalog” is used to showcase several products in one module via use of product tags. The single product module is therefore especially good at creating awareness about one single product. The Product Catalog module then is perfect for showcasing your entire product database or one product category such as your different types of shoes.
In the examples below you can see how the different modules look when they are applied on a website:

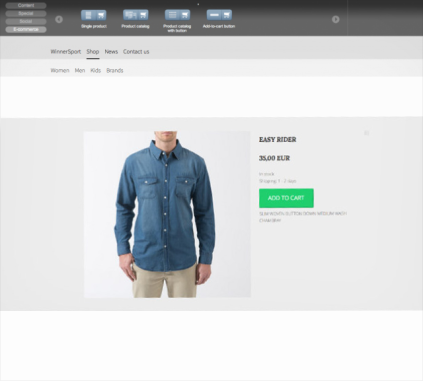
When you want to insert a product on a page you should start by choosing an E-commerce module and dragging it onto the page. Then you decide which product (or products) you wish to show in the module by choosing the name of the product in the drop down menu inside the E-commerce module. If you created tags for your products and variations (read more about tags below) you can then choose the products you want by entering their tags in the module.
Categorizing & tagging
Once you have set up the webshop structure and products and have a general idea about the selection of E-commerce modules, the next step is to categorize the products with tags.
A tag is a keyword that you can use to differentiate which products you wish to show in the E-commerce modules.
Note! Tags are case-sensitive and you should therefore be aware of the use of capital letters. If you for instance create the tag ‘Bangles’ (with an uppercase B) you should also enter the tag ‘Bangles’ with an uppercase B in the module. If you write the tag with a lowercase b; 'bangles', the module will not be able to locate the tag from your product database. If you have several tags that you want to show in the same module you should simply use a comma between the tags e.g. size, color, handmade etc.
Find further information on categorizing and tagging your products on Mono Academy here.
Example of how to use tags:
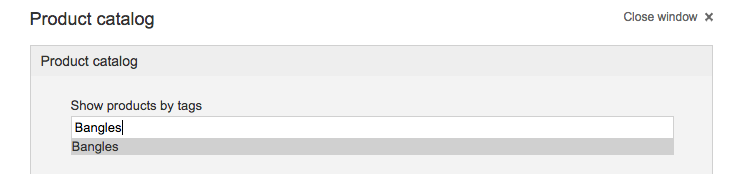
Scarabée Jewellery have used the module ‘Product catalog’ and entered the tag ‘Bangles' in the module.
- Enter the tag ‘Bangles’ in the E-commerce module.
- Products with the tag ‘Banlges’ are shown in the module
2. Products with the tag 'Bangles' show in the module on site

Your shop preferences give you plenty of opportunity to set and build your shop, customized for your needs. You can for instance choose the currency for your products e.g. EUR or USD. You can also indicate shipping costs, enter Terms & Conditions, customize confirmation and order emails and much more.
Email texts
Once a customer has placed an order in your shop an order confirmation will automatically be send to your customer's email address. Once you have processed the order and thereby withdrawn money from your customer, an invoice will automatically be sent to the customer as well.
You can customize your external communication by adjusting your email texts such as the confirmation email and the invoice. You can also upload a logo, add contact information, tax numbers etc.
TERMS AND CONDITIONS
It is often a legal requirement to include terms and conditions for your shop. Your customers must be able to accept these terms prior to purchasing an item from your shop. In the tool you can create your terms by clicking Shop preferences > Checkout > Terms. Simply insert a link to a subpage on your website you've created including your terms.
The subpage with your terms does not have to be a part of your main menu and you can therefore choose to hide the page in the page settings. However the subpage should still be easy to find in order to create transparency and credibility.
A good place to link to your terms and conditions is in the footer at your website. This is both a discrete and user-friendly solution. The page should in itself be kept simple with a focus on structured content.
You can see an example of terms & conditions on Milibe Copenhagen here.
To receive payment, you can choose from several payment gateways (to accept payments with credit cards) or offer a bank transfer option. Our e-commerce solution supports different payment gateways such as; Paypal (Global operator), Quickpay (Scandinavia), Authorized.net (Global, but mostly US), Sage Payment Solutions (US & Canada), Ideal (The Netherlands), Paysera (Global operator) Simplify (US & Ireland). All of the payment gateways offer multiple payment options for clients such as Visa, MasterCard, etc.
Payment gateways
To receive and process orders and thereby receive payments, you should start by setting up a payment gateway account. Afterwards you integrate the account on your Mono website through a number of settings.
You can find more information about creating and setting up the payment gateways below.
Once you have set up your payment gateway you are ready to publish your webshop and receive payments. When a customer completes a purchase and places an order you must process or cancel the order in the tool manually.
To process an order, go to ‘SHOP’ and click the ‘Orders’ tab. Click the Order Id e.g. #1. The tool will show a complete overview of the ordered items, customer contact information etc. If you are able to deliver the order to your customer click 'Process order'. The money will be withdrawn from the customer’s payment card and inserted on your gateway account automatically. If you cancel the order the money will not be withdrawn and no invoice will be generated.
Important! It is very important that you do not withdraw the money directly from your payment gateway account. Instead you should always withdraw the money by processing orders in Mono as described in the above. If you withdraw the money directly thorugh your payment gateway account you will not be able to process the order in Mono. The customer will not receive an invoice and you will have to make one manually.
The increasing use of the Internet from mobile devices demands for a mobile-friendly webshop that can be browsed anywhere at anytime. Luckily, if you've created your website recently, it is already responsive thus ensures the best user experience possible as the design renders to all screens regardless of mobile device browsing your site.
It's worth noting that Google now uses mobile-friendliness as an official ranking signal for mobile search results. Thus, Google ranks mobile-friendly websites higher than non-mobile-friendly websites in serach results. You can read more about Google's announcement on the demand for responsive design in our blog post here.
Examples of a mobile shop:
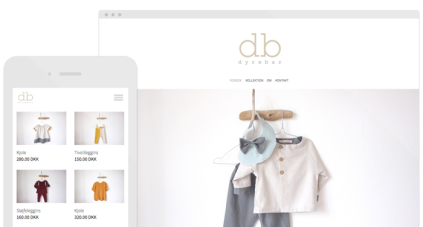
On the Jo & Jö and Scarabée Jewellery examples below you can see mobile webshops created in our tool.

We have now taken you through the basic steps in how to get started with your webshop in the site builder. The tool offers a broad range of E-commerce modules and design elements so you can create your professional branded webshop in just a few moments. When your have put in your products on your website and integrated your payment gateway you are ready to go live. Simply push the 'Publish' button. Your shop is now ready for accepting orders. The site builder enables you to capture and draw money directly on the website through a payment gateway. Thus, it only requires some basic tool knowledge and a little creativity to get your company up and running online.
We wish you the best of enjoyment. Happy website building!